Creating Document Shortcuts
09/09/16 - Ref A5201
Within the Documents/ Emails tab in the Jobs screen you can create shortcuts to frequently used templates. From here you can then easily create and populate the documents with the appropriate information, convert them to PDF and email directly to your customer. A copy of the document is then retained for future reference or use.
Using the Documents Shortcuts buttons to perform this repetitive task can remove several steps from the process of creating, saving and printing a document.

Within Job Tracker this functionality can be enabled or disabled depending on your requirements, and much like you can create invoices at the click of a button, this function allows you to click on shortcuts to other frequently used documents, allowing you to create, convert, print and save a document all from one click.
To enable this function, access the Control Panel, select the Program Features tab then click Enable/ Disable Features.
Click Program Settings 2, tick Template Shortcuts for Jobs, click Apply & then click Exit.
Once the feature has been enabled, when you return to the Jobs screen and access the Documents/ Emails tab you will notice that these button boxes now appear.

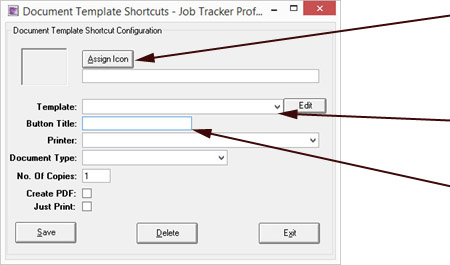
Hold Ctrl key and click your mouse on one of the empty shortcut boxes, a new pop up box will appear (image below).
Completing the fields in that screen then allows you to set the actions that you want completed in future with just one click on the shortcut button.
It will automatically populate the information from the job in the template document, and you can select which printer to use and whether a PDF version is required.

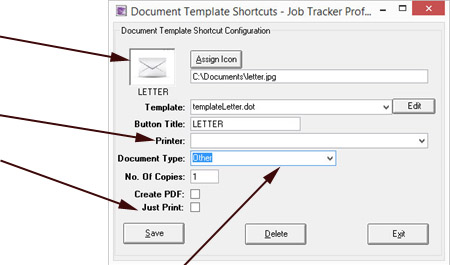
You can assign an icon to the button to make it easier to recognise visually. Click Assign Icon and navigate to select your required image. In the Template field click on the down arrow and select the template that you want to assign the shortcut to. The template needs to have already been created in the usual way and saved in the appropriate file as specified in the File Locations tab in the Control Panel. Populate the Button Title field with an appropriate brief title, this will appear under the button & icon in the Documents Shortcuts area. This title will also appear in the description field on the list of previously created documents shown in the Documents / Emails screen
This large field (top left) shows you how the box will appear (Button Icon & Title) in the Documents/ Emails Screen. Use the printer drop down menu and choose from all available printers. Doing this alone will not print the document automatically when you use the shortcut button, but it will assign the required printer ready for you to click print when in the document. To have the document print automatically when clicking the shortcut button, tick the Just Print box here. This will automatically print the document upon creation and will print on the printer that you have associated to the shortcut button. Use the No. Of Copies field to determine how many copies you want when the Just Print option has been selected. Using the Just Print option means that the file will not open in another screen, it is simply created, printed and recorded. Click Create PDF to have a PDF version created and saved instead of an editable document. This does not open the file on screen, just creates a PDF ready for use and records the details on the Documents/Emails screen. It will print automatically if you have ticked the Just Print option. An editable version will not be saved.

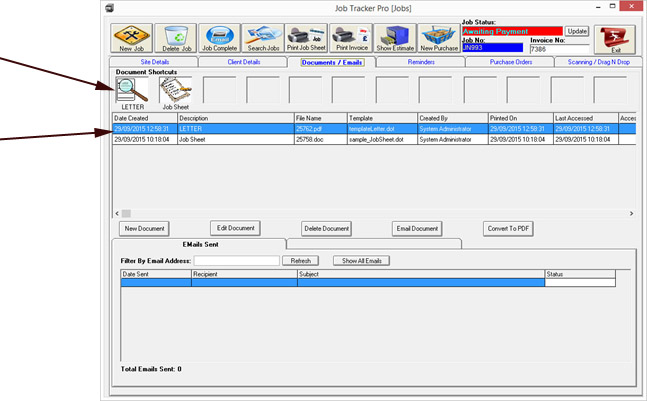
Here you can see two buttons that have been preprogramed, showing the assigned icon and the Button Title underneath. These can be amended at any time by holding down CTRL and clicking with the mouse on the button. The Button Title also appears here once the document has been created. If you have programed the button to Create PDF, only the PDF version will show here. CREDIT NOTES
This same process can be used for the creation of Credit Notes. Create and save your template in the usual way, then when programming the shortcut, simply select Credit Notes in the document type and choose your document. The credit note number will be generated in sequence and the starting number can be set within the control panel, counters and data.
Use [CREDITNO] as the field code within your template to have this credit note number automatically populated within your document.

