You can customise this screen to better suit your unique business needs.
You can rename the fields, change their colour, size, location, and properties.
You can even set their default values to save time then creating new jobs.
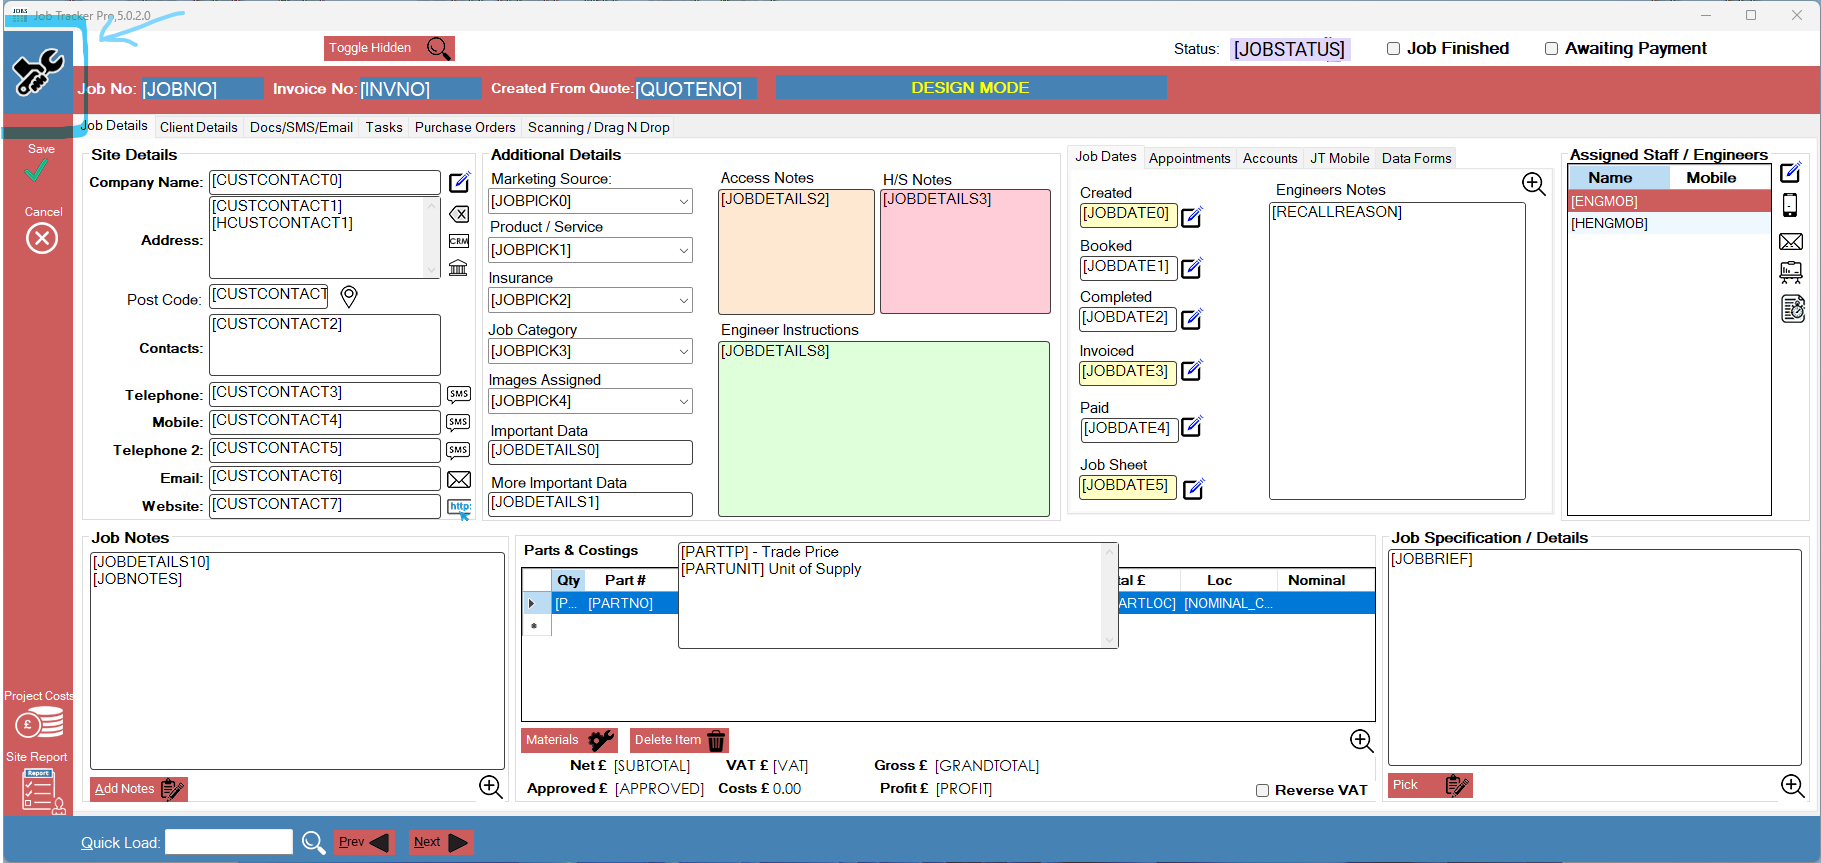
To access editor mode in the new Jobs screen, press Ctrl and left mouse click on the spanner icon top left of the screen.
You'll notice the colours change and also the field codes appear within the various boxes.
These are field codes you can use to automatically insert job data into your documents like job sheets and invoices.
Click here for more on that topic.
To edit the properties of a particular field, again press Ctrl and left mouse click in the field you wish to edit. A new window will appear like below.
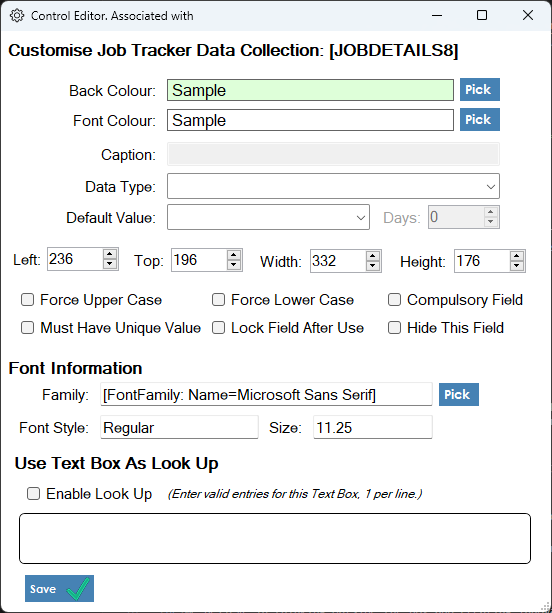
In this window you can edit the properties for the field you have selected, such as:-
"Help, Ive hidden fields by mistake and can't see how to get them back."
Editing hidden fields
Don't panic if you've hidden fields by mistake, click the red button at the top of the screen, 'Toggle Hidden'. This will show all hidden fields for you to access and edit their properties if you wish. Once you have finished editing the screen, all hidden fields will again be removed from view. Once you have set the properties as required, click save. Then repeat the process with the other fields as required.Once you have finished editing the properties, click the save button top left underneath the spanner icon. Then click CTRL and left mouse click the spanner once again. All changes will have been saved and will show next time you access the job screen.
NOTE - the changes you make with show for ALL Job Tracker users in your business.
Contact Us
We constantly invest in the continued development and growth of Job Tracker Professional, Job Tracker Mobile, and all their associated products. We're always listening to our customers and making enhancements that really do make a difference. If you would like to know more about a particular feature, please get in touch. Tel: 01255 830113Not Already a Job Tracker Customer? Request Your free demonstration